|
At point I arranged the the speed controls and
other electronic items on the plywood shelf. Just checking
the mounting location that I like. The final mounting
locations will more than likely change before the model is done.

Click on image to enlarge
Glue a small sheet of plywood to act as a shelf, place your
receiver, receiver battery and speed controllers onto this
sheet, wire all together and to the motors.
Model Slipway
would suggest that you use as big
a battery as possible. As using a larger battery will act as removable ballast, thus
making your model easier to carry around. Test fit the battery
into place but do not fit the battery
or lead ballast until the model is complete.
Remove the radio control
equipment until the model is finished so that it does not get
dust, paint or varnish into it.
|
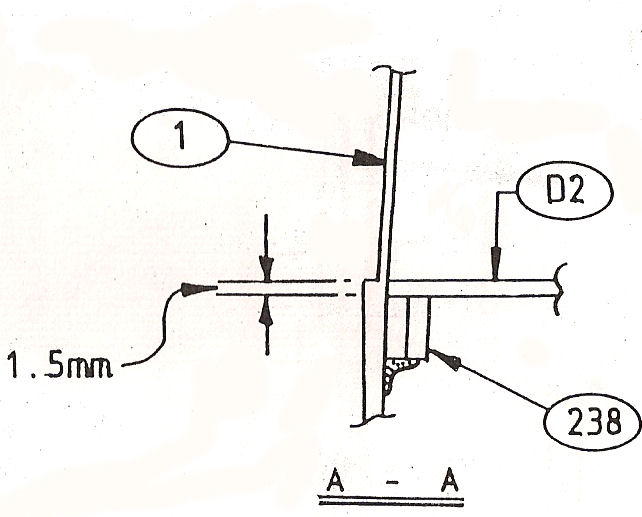
Look carefully at SIDE 2 on the plans and Drawing
NO.3 in the manual.

Click on image to enlarge
I glued the support strips (238) into position a bit differently than
described in the construction manual. Here is how I did
it: First I cut some pins from 1/16" brass rod about 1
1/2" long. I had a bout 24 of these already cut from other
projects.
First I drilled a series of 1/16" holes around the hull at deck height.

Click on image to enlarge
|