|
Hull Construction |
|
  
Using the plan
and pencil marks as a guide, draw the recess in the shoe. Carve
out the wood in this area with an X-Acto®
knife. Also, carve and sand the tapered keel line, using
the pencil line as a guide.
Roger's Notes:
In order to get a more accurate cut out, I first used a razor
saw and made small cuts down to the cut line. Then I used
an
X-Acto®
knife to remove the remaining wood. I also checked the fit
of the shoe during the process of marking and drilling the
needed holes.

Click on image to enlarge

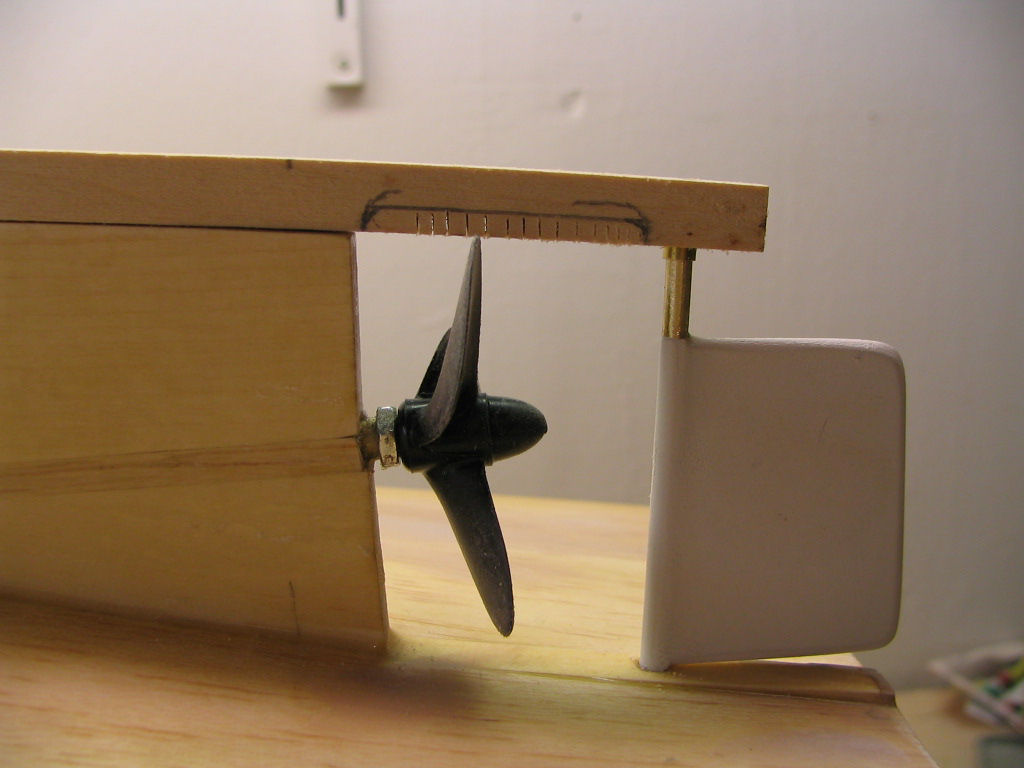
Temporarily
press the brass rudder bushing into the shoe. Re-install the
shoe on the keel, as shown. Check the prop clearance and
alignment of the bushing with the rudder shaft Make any
necessary adjustments to allow the rudder to pivot freely.
Holes are drilled in the keel and
threads are cut.

Click on image to enlarge
The shoe is test fitted again... and
it fits!

Click on image to enlarge

Click on image to enlarge
Roger's Notes:
Adjust the depth of the recess in the shoe to allow the prop to
be unscrewed from the prop shaft without hitting the shoe.
Later, this will allow you to make prop changes and minor shaft
adjustments without removing the shoe.

|
|
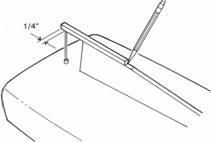
Shoe

Insert the
rudder shaft into the rudder post. Position the shoe on the
keel so that it extends 1/4" behind the rudder shaft, as shown.
Mark the location of the shoe on the keel, as shown.

Remove the
rudder shaft. Align the shoe with the pencil mark on the keel.
Mark the screw locations. shown on the plan, on the shoe. Drill
through the shoe and 1/4" into the keel with a 1/16" drill bit.
Remove the shoe from the keel and drill out the holes in the
shoe with a 3/32" drill bit.


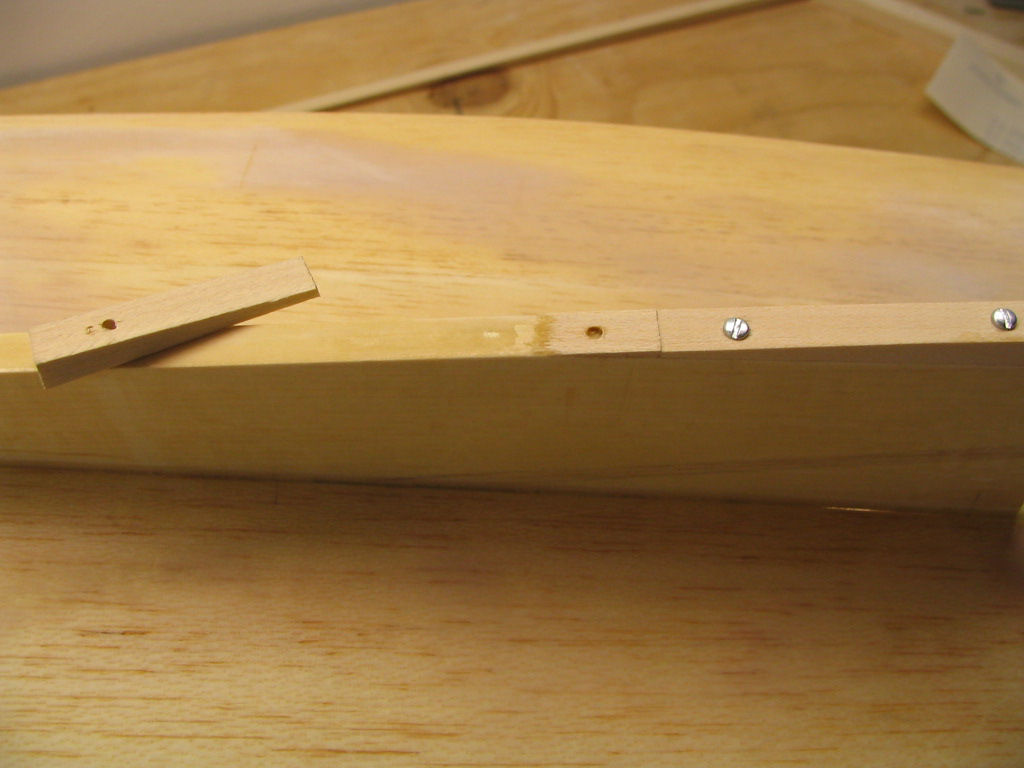
Mount the shoe
on the keel with the two #2 x 1/2" sheet metal screws. Use a
ruler and pencil to draw the extended keel line on the side of
the shoe, as shown.


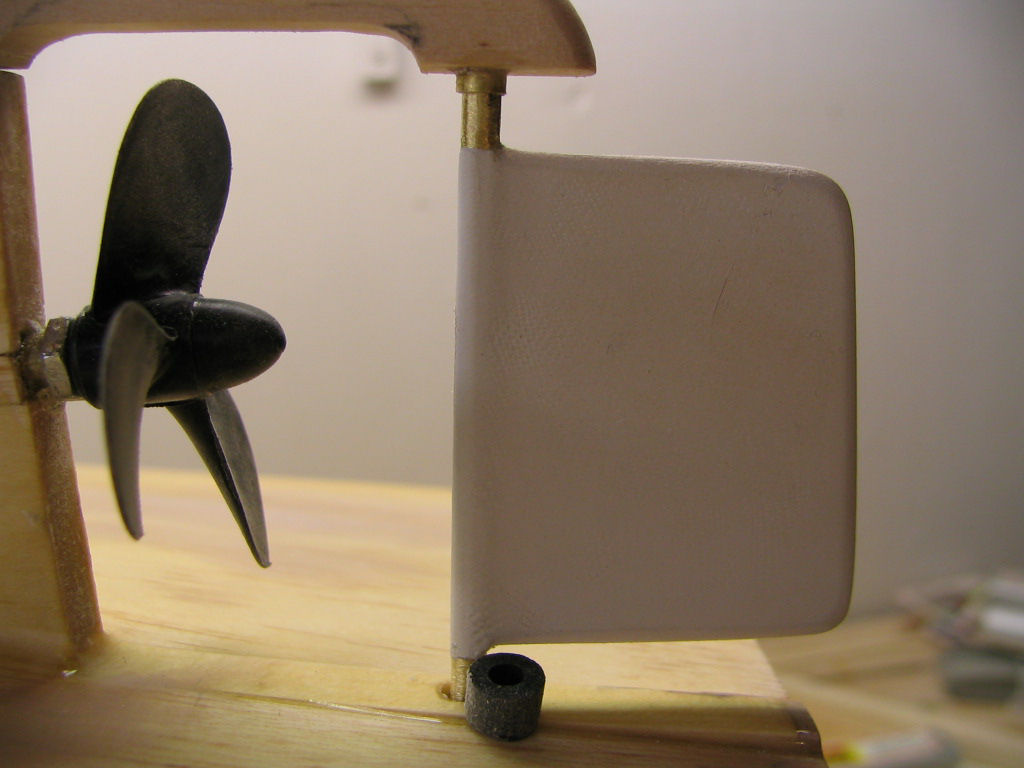
Remove the
forward sheet metal screw from the shoe and the masking tape
from the threaded end of the prop shaft. Turn the shoe to the
side. Turn the prop onto the prop shaft until it hits the stop
nut. Re-install the rudder shaft. Then, turn the shoe back until
it hits the rudder shaft. Mark the locations of the rudder
shaft, back of the keel, and the bottom of the prop on the shoe,
as shown.


Remove the shoe
from the keel. Drill through the location of the rudder shaft
with a 5/32" drill bit.

Roger's Notes:
To avoid splitting the wood, you can start by drilling the first
hole with a 3/32" drill bit. Then, enlarge the hole
with a 5/32" drill bit.
|